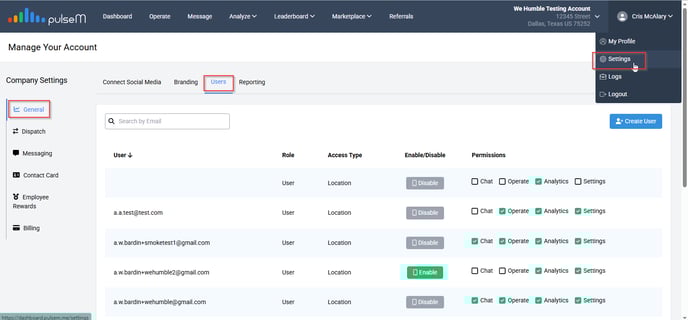
The 'Users' section enables you to add dispatchers and chat users to your pulseM account and configure their access. To add a 'User' or manage their access, begin by logging in to your pulseM account and navigating to ( Settings > General > Users).
Add a User
Having separate users allows you to be organized with your employees, and creates accountability.
To add a 'User' account, locate and click the blue 'Create User' button. Enter in the desired email and password for the dispatcher account.

Then, grant the dispatcher the appropriate permissions.
Dispatch: If enabled, the 'User' will be able to dispatch Bios and pulseChecks from inside of pulseM.
Chat (if applicable): If enabled, the 'User' will be able to access Two-Way Messaging to manage and send text messages.
Analytics: If enabled, this gives the 'User' Admin right to view the Analyze tab and all data therein
Settings: If enabled, this gives the 'User' Admin right to view the Settings tab and all data therein
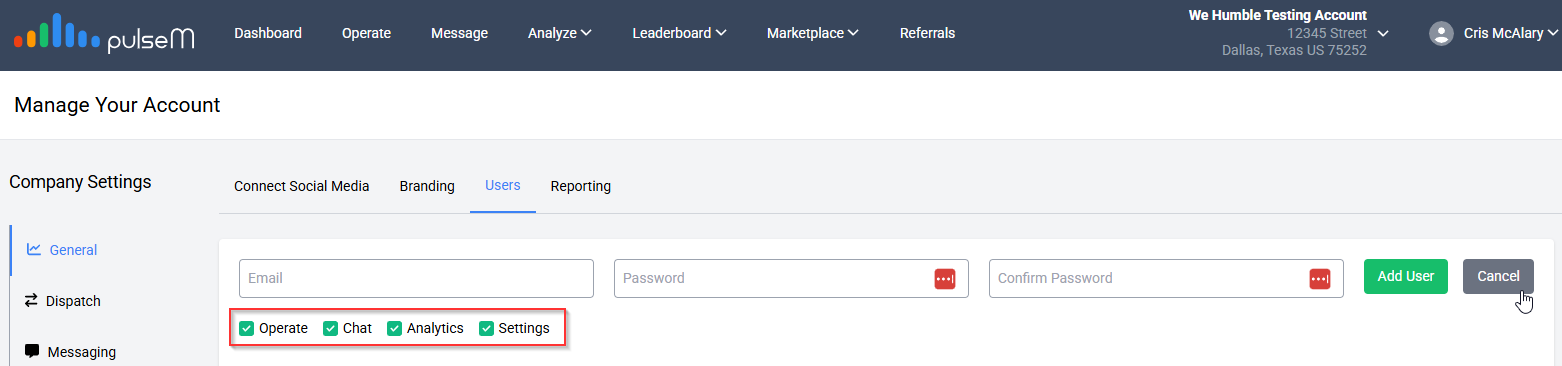
After granting the permissions, click the green 'Create' button. Please note that a verification email will be sent out to activate the account, so be sure to enter a valid email address!
Edit User Access
After creating a user for your pulseM account, you may configure their access for 'Dispatching' or 'Chat' by enabling or disabling the check mark to the right of their email address.
You may also enable/disable their access to the account by clicking the gray 'Disable' button to remove access, and clicking the green 'Enable' button if they need to regain access.

You have now created a 'User' for your pulseM account, thank you for following along!